December 13th, 2016

Cold busting lemongrass & ginger tea self-brew

.

Coco&Me - Recipe for ginger & lemongrass tea self-brewing in thermos flask - www.cocoandme.com

.

This post is in two parts. First, it’s the recipe itself, then secondly, there is my story on what it is like as I travel with this flask on the red bus to get to the chemo treatment that I am having at the moment.

.


.

Part 1: The recipe.

Whenever I travel, I concoct this tea in a thermos flask & take it out with me. It takes just a couple of minutes to put together, it’s so simple, I just let the goodness steep on its own accord while traveling.

.

I like to sip this as the day unfolds. Like while waiting for the bus on a freezing day for example. I pour just a tiny bit in to the cup so that it cools down quicker, then take a sip & enjoy the deep, warming zing of the ginger & the crisp, purifying aroma of the lemongrass. I feel its warmth seep in to my body & envelope me & shield me from the cold.

.

Its weird to admit to, but this tea flask is starting to become almost like as if Linus’s security blanket for me. Whenever it’s too much, I take a break with it. Even while walking on the street at times! I stop & take a sip by the sidewalk & let the world pass by. I find that it is a great calming way to take a step back from the hustle & bustle. I now realise that the time you enjoy taking a break is not wasted time. It reminds me to slow down & most importantly, allow for that.

.

Coco&Me’s recipe for cold busting lemongrass & ginger tea brew

.

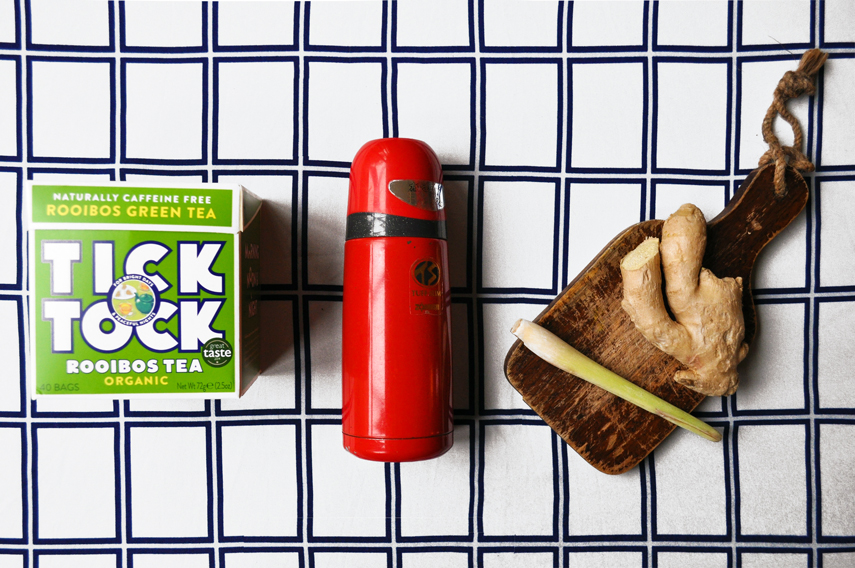
Ingredients:

Fresh lemongrass

Fresh ginger root

Tea bag of your choice (caffeine-free would be ideal, like rooibos tea or chamomile)

Honey to sweeten (optional)

.

Method:

1. Boil some water in the kettle.

2. Cut a slice of ginger. Just a slither is plentiful, otherwise it becomes too spicy & dominant in the tea. Peel the skin, & place this in the thermos flask.

.
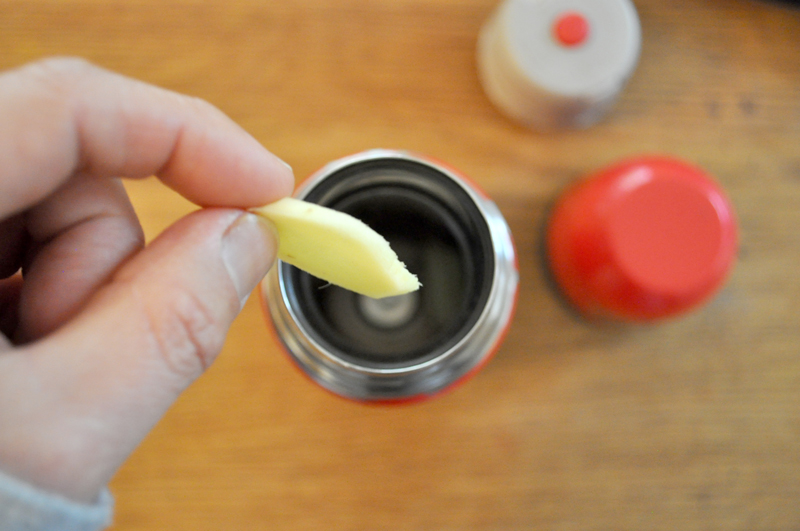
cocoandme_ginger_tea

.

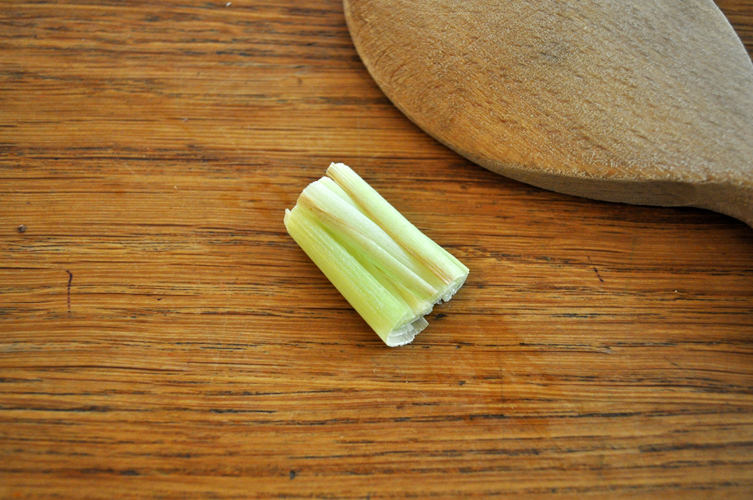
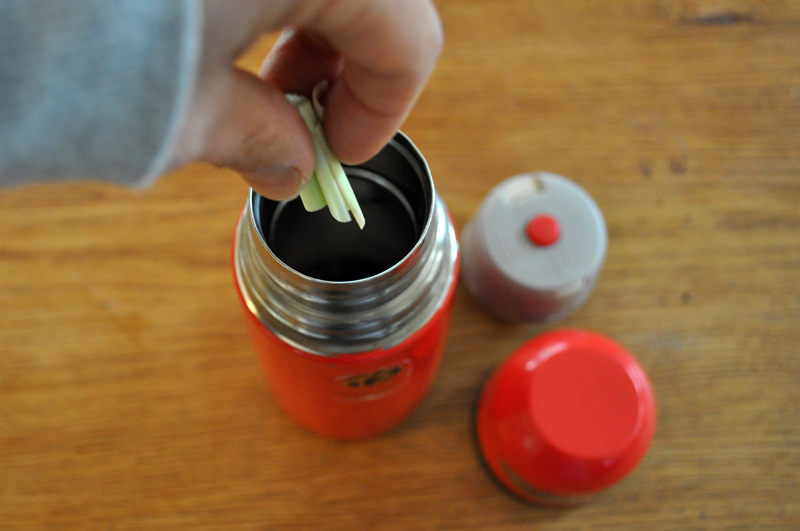
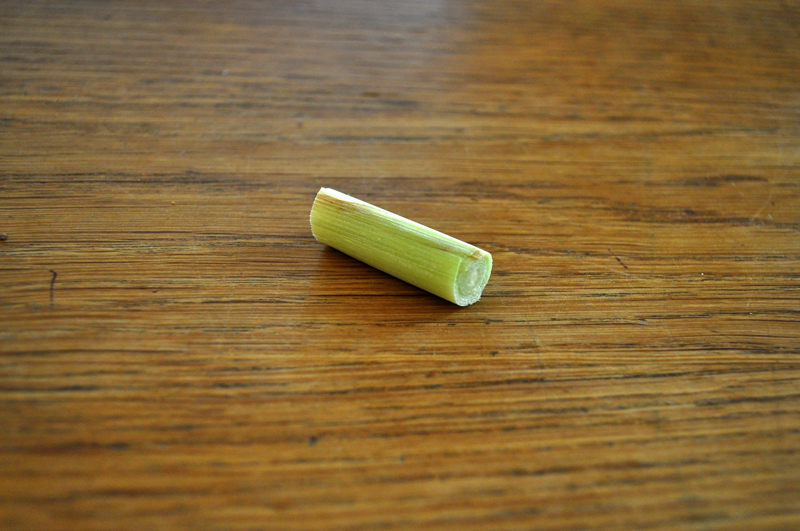
3. Next, chop off about 2cm of lemongrass. Using the back of a wooden spoon, smash it to bruise & release the aromatic oils. Pop this in the flask also.

.
cocoandme_lemongrass_1

cocoandme_lemongrass_2

cocoandme_lemongrass_flask

.

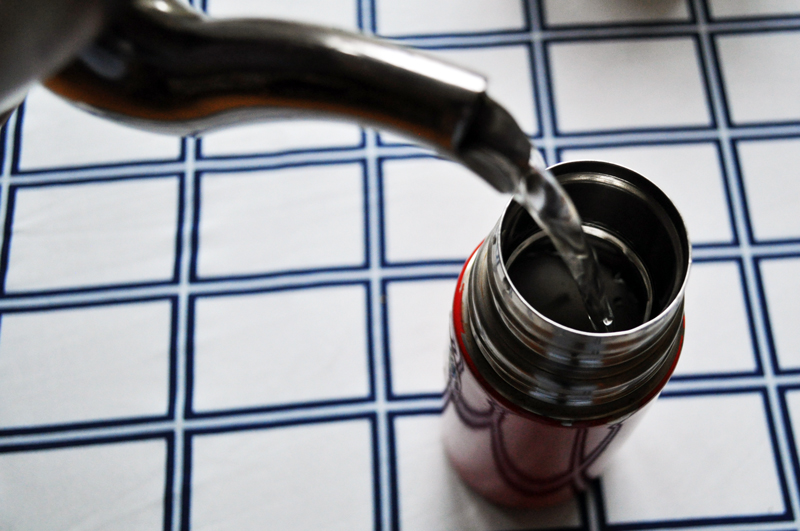
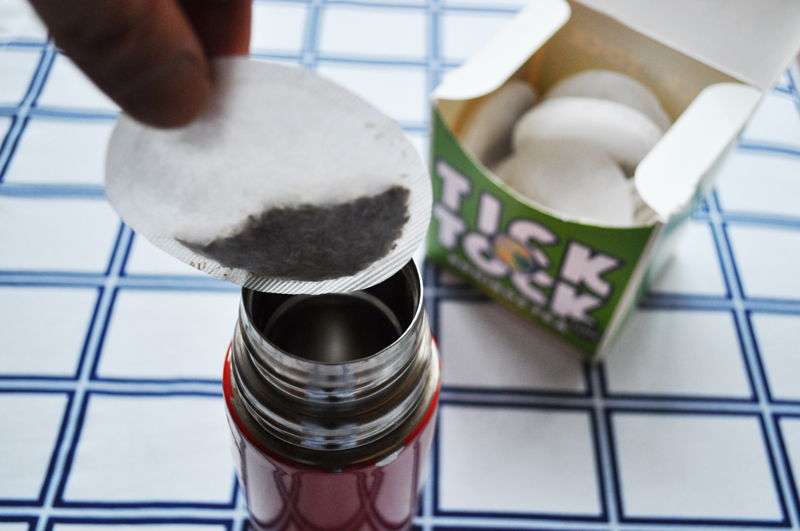
4. Pop the tea bag in the flask & pour in the hot water. Let the tea steep for a while & then discard the bag.

.
cocoandme_ticktock_flask

cocoandme_tea

.

5. Then secure the lid. That’s all! :) It’ll be flavoursome after about 30 minutes. 

.

.


.

.

Part 2: As on my way to the chemo treatment.

Thursday morning. Eight o’clock.

.

The day starts with my earnest intention to leave the house much earlier than Mr.D who stands in to walk our daughter to school. I want to get to the hospital quick to start on the treatment so that I’ll be home by the time when the children come home from school.

.

But I get too involved when I enter the kitchen – I see the washed up plates & pots from last nights dinner on the dish drainer by the sink & the compulsive in me finds some work to do. I circuit around & around the central kitchen in a hurry to put things away in to the cupboards. Have I ever told you that I hate my stupid kitchen island? It makes me feel like a guinea pig on one of those round spinning what-you-call-its.

.

I’m the queen when it comes to multitasking (a much positive way to put it rather than saying impatient jitterer, which is what I really am!), so amidst the tidying I prepare my breakfast, which this morning is porridge with slices of kiwi & dried prunes. With the same chopping board I also cut a small piece of ginger & pound a thumb length of a stalk of the lemongrass. These I pop in to the travel flask filled with hot green-rooibos tea to steep. It’s amazing this, just the tiniest pieces perfumes & permeates the tea. I feel like I’m doing something right & healthy by drinking it. I tuck this travel flask in to my rucksack, together with a small bottle of anti-bacterial hand gel which I now carry around everywhere, because chemo compromises the immune system & I’m freaked out about germs on public transport!

.

I leave the house to journey to the hospital. It will take me around an hour & a half on the bus with one interval change.

.

On the first bus that I take, a scruffy possibly homeless man comes on. His worn out clothes are dirty gradients of grey. Except his t-shirt. It’s bright blue with the superman S logo. If there ever was a superman & I was Clarice, this beatened superman looked unpromising to bring some peace to my troubled world.

.

Next, I sit on the icy cold metal bench as I wait for my second bus. The thing about England is that it’s so cold for most of the year. There’s not really a real summer here, it’s hot for only like two weeks then that’s the summer done! So I have a go at the bench. “C’mon, seriously? Do you have to be metal? You’re super icy!” ~ This is all in my head of course. Don’t worry, my screws aren’t that loose yet!

.

This is the perfect time to take out my thermos flask & pour the hot tea in to the cup that also acts as a lid. The purifying aroma of the lemongrass feels like it’ll shield me from the cold, & the fiery kick from the ginger warm my body from the inside. I’m convinced that if anyone should take a thermal image of me & the others at the bus stop, I’ll be the one that is glowing reds & yellows, while the rest will be in shades of blue.

.

Soon enough the bus for the second length of my journey arrives. This one takes up the longer part of my travel so I sit upstairs on the double decker bus. My preferred side to sit is always the curb side so that I can look at the passing shops. It’s interesting you know, the kind of shops out there. There’s ones that’s like“How on earth are they surviving?” & I’m not kidding, it’s the sort that both you & I will think so in unison. But surely the shop rent isn’t cheap either. Sometimes, there are shop-keepers that lean by the doorway, arms crossed, looking bored stiff. Er, yeah, that’s really gonna bring the customers in, isn’t it…

.

I plug my earphones on & listen to the BBC radio programmes that I pre-downloaded on my iPhone. Listening to it & all the while looking out of the window is entertaining enough to pass the time. Food related programmes are my favourite to listen to. This particular instance they were cooking at the same time as talking & I hear the sizzling sounds of frying the fatty bacon with clear stereo audio. Ahhh my-my, it is food porn for the ears I tell you! The sounds of the kitchen are my favourite sounds that I behold so fondly. Love it. I subtly smile to myself for my own silly reaction & decide to take another sip of my tea. I briefly pondered wether the distinct lemongrass aroma may be too intense for the confines of the closed air of the bus, but heck, I pour some out anyhow.

.

Listening to radio, I observe the people getting in & out of the bus from my upstairs seat. I noticed the young lady waiting by the bus stop straight away. Something about her is so radiant. Y’know what, it’s that youthful look with the air of carelessness. No sign of apparent worries, confidently living the moment. – It’s such a contrast to me, I thought. Me, makeup-less, on way to the ghastly chemo, with my balding head hidden under the beanie, finger-tips tingling with peripheral neuropathy, weighed down with anxiety for having to freeze my head with the cold cap again. As a fully-fledged adult you know that the grass is not greener on the other side, & blah blah blah, but nevertheless, I feel… jealous… & it tugs at the emotions that I want to keep stabilised. Undergoing chemo compromises the immune system physically for sure, but also emotionally it seems. I think tea again should help. I sip it & close my eyes as I gulp & feel the warmth trickle down deep.

.

It’s a funny thing, now that I’m not busying myself with the baking, I notice my surroundings much more so. Keeping up with the appointments is busy enough, but the truth is, the little people in my head are also feeling like the shop-keeper leaning by the doorway with arms crossed, looking bored stiff…

.

Ps: Two more chemo sessions to go! – Last one on 21st. Then 4 weeks of radiotherapy from mid January.

.

.

October 12th, 2016

Fluffy & plump Japanese brown rice

.
www.cocoandme.com - Coco&Me’s recipe for fluffy & plump Japanese brown rice

.

(( Note: this article is really long, so if you’re just after the recipe, click this link to jump down the page! ))

.

Here is a recipe to kick start the revised Coco&Me blog!!!
I’d like to introduce to you my go-to recipe for brown rice. It’s probably going to look like no-frills (it’s just rice after all!) but it is perhaps THE apt one to be featured as my first recipe. Because being Japanese, rice is my staple food. It forms the foundation of my meals. It’s so often that I eat it that it makes sense for me to try & make my rice meals healthful by opting for wholegrain brown.

.

Anyway, hope you like the recipe! It’s a bit long winded as always my recipes…, but hopefully I have covered enough material so that I can convey how beneficial it is to opt for brown rice, & how, with the correct cooking method, the time & effort that you’ll put in will reward you with rice that is tasty & that will become your go-to recipe too! :-)

.


.

The case for eating brown rice:

Although we all understand that opting for brown rice is good for our body, a lot of us might be unclear on what on earth it’s really good for perhaps? If someone asked me what each B vitamins are good for precisely, I’d be so fuzzed up! So here is a quick glance chart comparing the nutritional values of brown & white rice, & explaining each’s benefit:

.

Nutritional comparison of brown rice & white rice (per 100g)

.

Nutrition
Brown
White
Benefits
Protein 7.1-

8.3

6.3-

7.1

Alkaline forming element is great for digestion, skin & mood.
Fat 1.6-

2.8

0.3-

0.6

Vegetable fat is unsaturated fat that reduce heart disease & lower cholesterol level.
Sugar 0.8-

1.9

0.1-

0.5

Brown rice has lower GI, so the glucose is released gradually into the blood. Keeping low blood sugar level keeps life-threatening complications such as diabetic at bay.
Fibre 2.9-

4.4

0.7-

2.7

Reduces high cholesterol level. It binds to carcinogens & prevents it from attaching to the colon walls thus helps eliminating them from the body.
Calcium 10-

50

10-

30

Builds & maintains strong bones, muscle contraction, heart & nerve function. Also maintains the acid/ alkaline balance of the body.
Phosphorus 0.17-

0.43

0.08-

0.15

Filters out waste in your kidneys. Grows, maintains, & repairs tissue & cells.
Iron 1.4-

5.2

0.3-

0.8

Makes haemoglobin that help carry carbon dioxide away from the cells & transport it back to the lungs.
B1

(Thiamin)

0.4-

0.6

0.07-

0.17

Vitamin B1 helps our body metabolise carbohydrates as energy fuel.
B2

(Riboflavin)

0.04-

0.14

0.02-

0.06

Antioxidant. It fights damaging particles (free radicals) that contribute to serious illnesses such as diabetes/ parkinson’s disease/ alzheimer’s disease/ cancer.
B6 0.5-

0.7

0.1-

0.4

Decreases chances of heart attack/ impact of radiation exposure/ high cholesterol. It increases stamina/ maintains healthy brain function.
E

(Tocopherol)

0.8-

2.5

0.1-

0.3

Promotes fertility, anti-aging property, healthy skin & hair.
Zinc 1.9-

2.8

0.8-

2.3

Helps the immune system fight off invading bacteria & viruses. Also makes proteins & DNA.
Niacin 3.5-

6.2

1.3-

2.5

Important in energy production/ processing fat in the body/ & regulating blood sugar levels.
Pantothenic

acid

1.4-

1.6

0.8-

1.3

Breaks down fats & carbohydrates for energy. Also important in maintaining a healthy digestive tract.
Folate 16-

20

4-

9

Important nutrient for before & during pregnancy. Helps the body develop new cells & prevent changes to the DNA that may lead to cancer.
Phytic

acid

0.13-

0.27

0.02-

0.07

‘Anti-nutrient’. It binds to the beneficial minerals & stops it being absorbed in the intestine. Humans produce very little phytase (enzyme that breaks down phytate) in our body so it’s best to soak the rice to reduce the phytic acid & increase the nutrient bioavailability. Sprouted/ germinated rice is even more beneficial as it increases GABA which helps to lower blood pressure, improve kidney function & stimulates cancer cell apoptosis (cell death).
(Numeric data from Encyclopedia of Food Grains by Colin W Wrigley, Harold Corke, Koushik Seetharaman, Jonathan Faubion). 

.

Eating brown rice means eating LIFE:

Did you know that if we sow brown rice, it will sprout? Whereas white rice will just rot? Brown rice, even the rice that’s been packaged & sit on the shop shelves, is still alive. ~ Life dwells in brown rice ~ Isn’t that simply beautiful? Personally, it was this moment of personal revelation that converted me to eat whole grains. It made me realise that, just like how apples that are freshly picked is joyful, the pleasures of eating ‘life’ is joyful. By receiving the life of things we eat, it fuels the burning light of our lives. Eating wholegrain brown rice is obviously nutritious, yes, but there is more to it that science can’t explain ~ it is good for our soul. 

.

The benefits of chewing:

As it is harder than white rice, brown rice will make you chew more. This might not sound necessarily beneficial, lol, but actually, chewing more has many benefits to offer!

.

– One benefit is that you’ll be eating less & taking in fewer calories! That’s because it takes 20 minutes for the brain to signal that you’re full, so, by having to chew more & consequently eating slower, you’ll be feeling full before you’ve finished the food on your plate!

.

– Another benefit is that chewing food is anti-cancer! Chewing stimulates the salivary glands to produce saliva, & saliva contains peroxidase which suppresses carcinogens in food = preventing cancers!

.

-Plus! As we continue to chew, it gets progressively sweeter! This is because enzymes in saliva convert starch into glucose.

.

Soaking the rice:

As touched upon on the ‘Phytic acid’ part of the nutritional chart above, phytic acid is a bit of a “party-pooper” in this otherwise perfectly nutritious grain. It’s an ANTI-nutrient, meaning, it interferes with the absorption of good nutrients by the intestines, impacting its bioavailability…! :( An enzyme called Phytase is the saviour here (it breaks the phytic acid down!), but very unfortunately, our human body create very few of this enzyme…, it’s just not enough… 

.

This is the very reason why we have to soak the brown rice for a really long time. Soaking increases the activity of the naturally present phytase in the grain – it breaks the hull of the rice so that we have access to the nutrients inside.

.

My recommendation for how long it should soak is overnight – around 12 hours – & more if you have the time (& patience…!). Start by soaking in lukewarm water (around 30°C), & leave it out at room temperature. After the 6 hour point, you might want to change the water.

.

Pressure cooker:

By cooking in the pressure cooker, your brown rice will be softer & taste less whole-grainy.  

.

I understand that if you’re new to pressure cooking, anyone at first has hesitation to cook with “Pressure”! I remember that I was too! I was super scared that the lid might blow off & that the hot stew would dangerously spew out! But when once familiarised, there is nothing as convenient. It would ‘boil’, ‘steam’ & ‘stew’, & can of course ‘save time’ & ‘save utility costs’ by dramatically shorten the cooking time.

.

Going beyond just brown rice to keep it interesting!

Exploring variety & getting excited about it is the key to success for continually opting for healthy eating! So here are some variations! It’s also a great way to add more nutrition to your rice with minimal fuss!

.

Brown rice + beans of your choice. (Such as dried chickpeas, adzuki beans, soya beans, cannellini beans and kidney beans).

1.Wash dried beans together with rice. 

2. Pre-soak the beans together with the rice.

3. Additionally to the water for the rice, pour in the same weight of water as the beans. 

4. Then cook! So simple! 

Note 1: I tend to toss in beans that are about 1/10th of the ratio to the amount of rice. Note 2: Adzuki beans does not need pre-soaking! Just add some in just before you cook the pre-soaked rice.

.

Brown rice + pearl barley.

Just replace some of the brown rice with barley. I tend to replace about 20%.

.

Tossing in a spoonful of hijiki or arame (sea vegetables). 

It brings the ocean flavour to the rice. No adjustments of water needed. No need to pre-soak the sea veggies too. 

.

Amount:

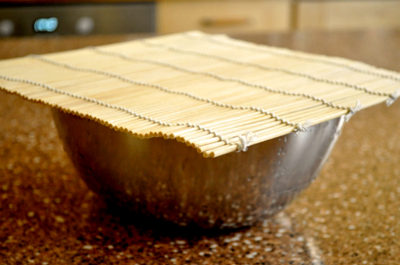
For a family of four like mine, I cook 300g of rice. Most of the time there is some rice left, but I like to cook that little extra to make sure there is always plenty to go around. If & when there is any rice left, I transfer it to a different bowl & once cooled, I place a bamboo mat over it to cover, & leave it out at room temperature. I then have it for breakfast or lunch the following day. Brown rice retains the flavour really well compared to white rice, & it’s still very tasty even if it is not warmed up.

.

Did I convince you?

Maybe you feel a bit resistant…? The fact that you have to steep it in water for over-night might be putting you off? I understand, I was like that before. But! Once you get in to the new slow rhythm of it, you’ll adjust, I promise! :-) It’ll become second nature to remember to prepare the rice in advance, just like remembering to put a shoe on before you go out! And you’ll start to see the benefits too – like how your energy lasts throughout the day! So why not start a brown rice life together with me? :-)
.
.


.
.
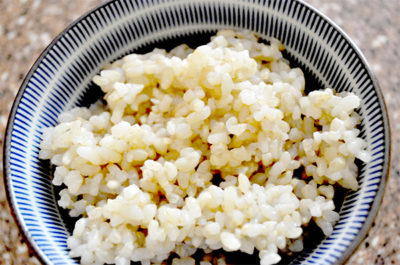
Coco&Me’s recipe for fluffy & plump Japanese brown rice (by pressure cooker)
.
Preparation time: 5 minutes to wash + overnight to soak the rice

Cooking time: 30 minutes

.

Ingredients for 4 servings:

  • 300g short grain brown rice
  • 1 teaspoon of salt (good quality salt, not table salt)
  • 450ml water (Please note, there may be a difference to the cook & feel of the rise due to the brand of the pressure cooker, so please use this figure as a ballpark)

.

cocoandme_brown_rice01www.cocoandme.com - Coco&Me’s recipe for fluffy & plump Japanese brown rice

.

Method:

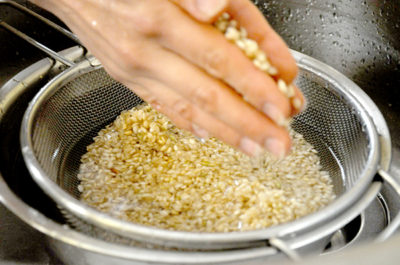
1. Put the rice in a large bowl or pot. Rinse & drain 3 to 4 times.

  • TIP 1
    For the first rinse, be quite brief about it. Pour in some water & quickly swish & drain. This is because, as the rice is completely dry initially, it rapidly absorbs the most water, & you wouldn’t want the unclear dirty water to soak in to the rice.
  • TIP 2
    The biggest tip to getting plump rice:
    The thin skin on the rice surface has a waterproof membrane, so by rubbing the grain together, you are scratching the surface of the grain, which will let the water penetrate faster. The most effective method to do this is to rub the grain in-between the palm of your hand in the water, just like how you wash your hands. Because the hands are like of the form of worship, in Japanese, we call it the ‘worship wash’.
  • TIP 3
    When pouring away the water, pour away the floated rice & dust too.
  • TIP 4
    (optional) I always rinse the rice in a clockwise motion out of habit, ever since I learnt that in traditional Oriental medicine, the clockwise motion draws energy in to the body, whereas counter clockwise will sedate and reduce the energy. ~ I find this pleasing to imagine, although I’d understand if this is sounding peculiarly superstitious! But when I am cooking for my family, I like the idea that I am inserting positive energy in to the foods that enter their body.

.

www.cocoandme.com - Coco&Me’s recipe for fluffy & plump Japanese brown rice

.

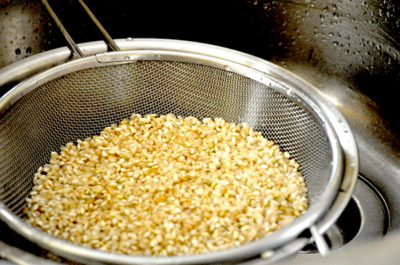
2. Use a sieve/ colander to drain away the water completely.

.

www.cocoandme.com - Coco&Me’s recipe for fluffy & plump Japanese brown rice

.

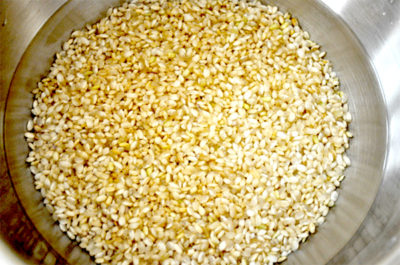
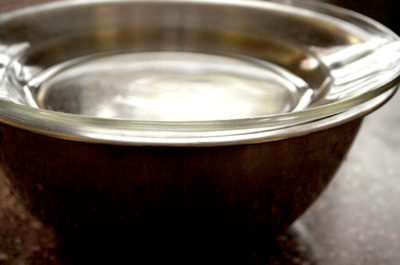
3. Place the washed rice in a bowl/ dish & immerse the rice in clean lukewarm water (around 30°C).
.
www.cocoandme.com - Coco&Me’s recipe for fluffy & plump Japanese brown ricewww.cocoandme.com - Coco&Me’s recipe for fluffy & plump Japanese brown rice
.
4. Cover with a bamboo sushi mat or a meshed food cover or a plate to stop any dust falling in & keep it aside for over-night (12 hours) at room temperature. After the 6 hour point, you might want to change the water.
  • TIP 5 – You could of course loosely cover it in cling film, but, bamboo mat or a meshed food cover will let the rice breathe. It’s also nicer to be plastic-free! :-)
.
www.cocoandme.com - Coco&Me’s recipe for fluffy & plump Japanese brown rice
.
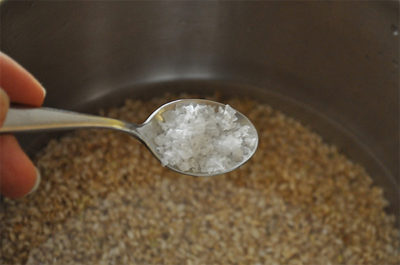
 5. When it is time to cook, drain the rice. Pour in the measured water & add salt.
  • TIP 6
    Salt here is not because of seasoning. It is used to take away the smell of the bran & cereal germ. Because it is not for seasoning, the amount of salt that you put in is very subtle. Maybe around 1/3 of a teaspoon per 100g of rice is plenty. The benefit of salt extends to increased plumpness as the rice’s absorption rate of the water increases by putting in the salt. Additionally, in Oriental medical term, salt “draws out and strengthens the life force”. A good reason to seek & use good quality salt!
.
www.cocoandme.com - Coco&Me’s recipe for fluffy & plump Japanese brown rice
.
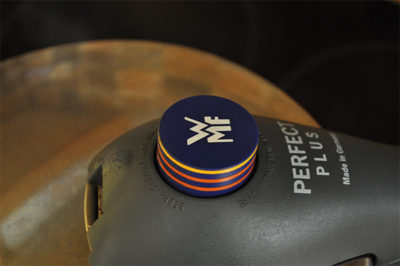
6. Put the lid on, secure the pressure lock & put it on high heat. Then let the gauge on the pressure cooker go all the way to maximum. Once it is at its highest, let it stay like that on high heat for 1 or 2 minutes more, then lower the heat to minimum, & cook for 20 minutes.
.
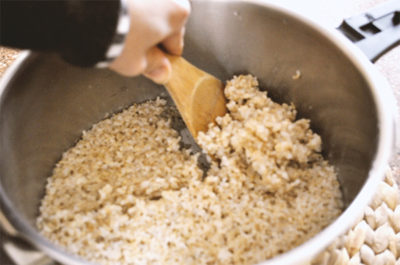
7. When the 20 minutes have past, stop the heat. But don’t open the lid yet! Let the pressure gauge go down naturally & let it rest for 10 minutes. It’s the last 10 minutes of steaming that is extremely important for fluffy rice!
.
cocoandme_brown_rice07
.
8. When you have finished the steaming, open the lid & use the rice paddle to turn the rice over so that the moisture is evenly distributed.
  • TIP 7
    To turn the rice without mushing the grain, first cut the rice in a cross, then use the rice paddle to fluff & loosen the rice from the bottom of the pot in quarters. By doing this, you’re distributing the moisture & releasing the trapped vapour. You’re also introducing air, which makes the sweetness & umami of the rice stand out. 
  • TIP 8 
    If you’re putting the lid back on, wipe the excess water on the back of the lid so that it doesn’t drop in to the rice & make it soggy!

.
.


.

September 14th, 2015

How to whip egg whites & obtain high volume with stability

Coco&Me - How to whip egg whites ~ How to obtain high volume foams with foam stability ~ www.cocoandme.com ~ Coco And Me

.

Getting the most out of your ingredients is, I think, one of the most delightful things to do as a baker or a cook. It brings out the best results (in our case, a fine & moist sponge that has high volume!) & because you know how to best approach the ingredients, you can progress with the baking in a relaxed, untroubled manner.
– I also think we can get a lot more out of the ingredients when we treat it with respect & use it to its full potential. By proceeding with respect & gratitude to our foodstuff for being available to us, the sense of pleasure from cooking with it & then eating it is tenfold.
.
In terms of baking, whipping the egg whites is an essential technique.
.
There are actually 3 distinct methods to whip ~ French, Swiss, & Italian way. Each are suited for different desserts. For example, the French meringue method is often used for sponge baking. The Swiss & the Italian method on the other hand are often used in cold mousses & cremes because the heat-process kills off bacteria, & makes it safer to incorporate.
.
The French meringue technique is by far the most widely used in home baking, so for this post I would like to focus on that & tell you everything I know to make foam that is fine & stable.
.
Fine foam = results in fine structured sponge (as opposed to course textured) that has a tender mouthfeel.
Stable foam = will not deflate so readily. Particularly vital for retaining the volume of the foam when folding in to the batter. It will also give you a bigger & fluffier sponge.
.
So, below, I have written the ‘how-to’ in steps (in bold letters) with the reasoning behind each (in regular letters). It gets a bit too science-y, but hopefully I have managed to get it across well enough! Happy reading~! xx
.
x . . x . . x . . x . . x . . x . . x . . x . . x . . x . . x . . x . . x . . x . . x
.
Coco&Me’s How Best To Whip Egg Whites
.
1. 
Start with eggs straight from the fridge.
.
I know some say use room temperature, & some say no, use refrigerated. ~ So here is the logic to both:
.
The room temperature egg white is indeed easier to whip. It will trap the air easier because the surface tension is weaker. (= surface tension is the elastic tendency of liquids which makes them acquire the least surface area possible). But the downside is that the foam is less stable/ easier to deflate because it is not as viscous/ thick.
.
Whereas, for the cold whites, although it takes longer to whip (because it is thicker), the foam will come out stable. You will be able to create a much finer foam too, as, when you whip the stable foam, you are successfully splitting it to smaller multiples without it deflating.
.
= Using cold refrigerated egg whites wins the competition.
.
Some patissiers even go as far as putting the egg whites in the freezer until it is 1~4 degrees centigrade so that they have the added effect of having a head-start.
.
2. 
Separate the egg whites in to a dry clean bowl that is not plastic. - Make sure you don’t have any broken yolk residue. 
.
The reason for both has to do with lipids (another word for ‘fats’.) The fats contained in the yolk & any trace amount of oil on the surface of your mixing bowl has the negative effect on the foaming properties. 
.
To explain why, I first need to tell you about what happens when you whisk:
.
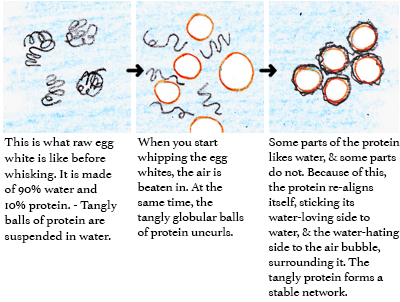
When you whisk the egg whites ~ which is made of about 90% water &10% protein ~ the tangly globular balls of protein uncurls. This is a process called denaturation, & as it uncurls, it exposes it’s long strands of amino acids. These amino acids has two distinct ends; the water-loving ‘hydrophilic’ & the water-repelling ‘hydrophobic’.
.
As the 10% protein uncurls in the 90% water, it aligns itself inbetween the water & the air, because of the hydrophilic/ hydrophobic nature. – Meaning, it immerses the hydrophilic end to the water, & sticks the hydrophobic end to the air.
.
Upon whisking air in to the egg whites, all the while, the uncurled strands get busy to attach to it & consequently traps the whisked in air within its new tangle. This tangle is now a network which crosslinks & holds its shape, stabilising the foam.
.
It’s a little difficult to grasp in words, so have a look at my diagram below:
Coco&Me - How to whip egg whites ~ How to obtain high volume foams with foam stability ~ www.cocoandme.com ~ Coco And Me ~ the perfect meringue
.
Getting back to why lipids (such as fats from yolk & the grease from the bowl) inhibits the foaming properties is because it interferes with the protein that want to make a stable network. Namely, the air bubble & the lipids are in competition for the water-repelling hydrophobic protein.  
.
As for why plastic bowls are not a good idea to use is because plastic is a porous material, & sometimes it can have residues of fats from the last use, even if you think you have washed it well.
.
3.
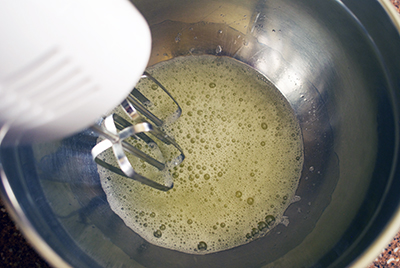
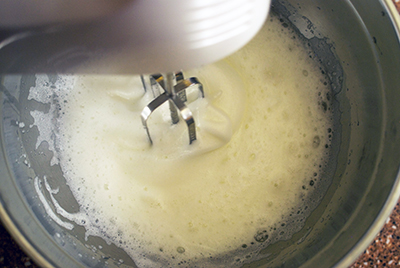
Firstly, on the lowest speed, loosen it up. 
The egg whites has two parts ~ the thick viscous portion that used to surround the yolk & then the other part which is watery. It is best to first whisk those two parts together to blend it. This is because the watery part gets foamy quicker as it has less surface tension (same explanation as in step 1). When the two parts are blended, they foam at equal speed.
.
Coco&Me - How to whip egg whites ~ How to obtain high volume foams with foam stability ~ www.cocoandme.com ~ Coco And Me ~ the perfect meringue
(First on lowest speed!)
.
4.
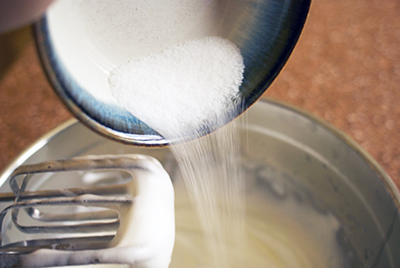
When most of the liquid has turned fluffy white, & the foam starts to cling to your whisk, put in the first 1/3 of the sugar. Then turn the speed to high. 
.
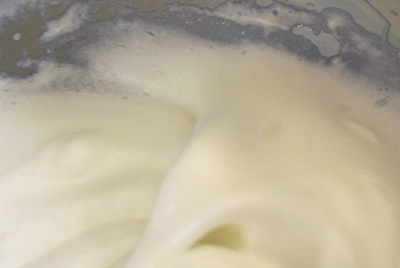
Coco&Me - How to whip egg whites ~ How to obtain high volume foams with foam stability ~ www.cocoandme.com ~ Coco And Me ~ the perfect meringue
(Ready for the first sugar to be poured in!)
.
The timing at which you add sugar is very important. If too early, the foam will not stabilise & will be syrupy. And if too late, the water within will leak. To figure the timing for sugar, it’s best to understand the role of sugar in egg whites.
.
Sugar is hygroscopic (= it attracts & holds water molecules from the surrounding environment).
.
When you add sugar, the water content of the egg whites is withheld. The water becomes viscous/ thick & elastic. This thickened water has a stabling effect on the protein structure & holds the air bubbles in place.
.
This viscous water greatly helps when the cake is in the oven, as, the water is so thick, it is difficult for it to readily escape as vapour. As a result, it holds the air bubbles in place while the cake structure is stiffening its shape around it.
.
Which is all great news, but on the other hand, it is important to know that sugar has a negative effect on the foaming properties & results in reduced volume. If the water is too viscous, it is difficult to form the bubbles inside.
.
This is why sugar has to be introduced in stages, with the right timing. The egg white has to be foamed enough to accept the inclusion.
.
5.
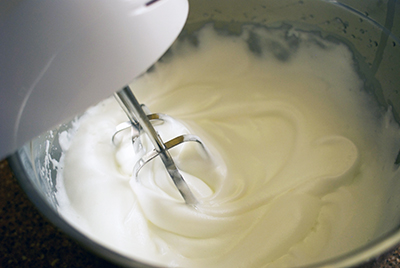
The timing for the next sugar is when the volume has massed, & the foam is starting to get evenly fine. Put in half of the rest of sugar. The speed of the hand mixer should remain on high.
At this point, think about how your whisk is mixing it. The ideal way is for the whisk to incorporate as much air, right? So, if the whole whisk-head is submerged completely in the whites, it’s not catching in any air.
– Also, rotate your bowl so that you are whisking from every angle, & from every nook so that it foams uniformly.
.
Coco&Me - How to whip egg whites ~ How to obtain high volume foams with foam stability ~ www.cocoandme.com ~ Coco And Me ~ the perfect meringue
(The foam’s evenly fine! Next sugar please~! Whizzing on high.)
.
6.
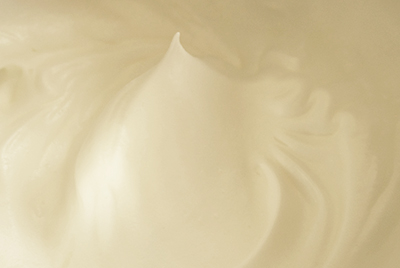
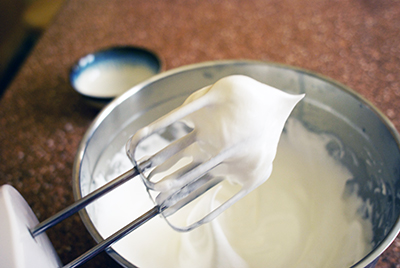
When you feel the foam is getting heavier & you can see stroke patterns, put in the rest of the sugar. – Nearer the end, when you think it has reached maximum volume, lower the hand mixer speed to low.

.

Coco&Me - How to whip egg whites ~ How to obtain high volume foams with foam stability ~ www.cocoandme.com ~ Coco And Me ~ the perfect meringue

(Soon as you can make strokes in the whites, put the last lot of sugar in.)

.

Coco&Me - How to whip egg whites ~ How to obtain high volume foams with foam stability ~ www.cocoandme.com ~ Coco And Me ~ the perfect meringue
(Done? Wait… there’s one last step…)
.
7. 
As a last step, whiz your mixer around the outskirt edges & tighten the foam to make sure that the foam is of equal fine-ness all over. 
In culinary terms this is called ‘serrer’. Foam on the outskirts tend to be less whisked. Because of that it tends to have a larger air bubble. In baking, it is best to have uniformly sized foam, as the larger air bubble will absorb the nearest smaller ones & become bigger (=’Coalescence’), giving you an unevenly textured sponge. 
.
Coco&Me - How to whip egg whites ~ How to obtain high volume foams with foam stability ~ www.cocoandme.com ~ Coco And Me ~ the perfect meringue
(Don’t forget the edges~! Above picture is an example of how the edges have bigger bubbles, so make sure you whisk these big bubbles too!)
.
x . . x . . x . . x . . x . . x . . x . . x . . x . . x . . x . . x . . x . . x . . x
.
Note A:
The ratio of whites to sugar:
When the amount of sugar is more than half of the whites, it is recommended to add sugar in 5 stages, not 3. This is because you’ll want to give each sugar inclusion a chance to melt before the next. – On the other hand, if the amount of sugar is less than 1/3 of the whites, the foam will be unstable & would not keep shape so well. The bubble will collapse too soon as it bakes & the sponge will come out too dense. I often hear of ladies with health conscience cutting back on sugar in the recipe, but I don’t recommend messing with it. But then again, so long as they don’t blame the recipe itself, it’s their cup-of-tea in the end I suppose…, right?
.
Note B:
About adding a pinch of Cream of Tartar & lemon juice or vinegar:
It’s all about the science-y pH balance…
.
The pH is measured between 0 to 14. 0 being ultimate acidic, 14 being ultimate alkaline. Lucky number pH 7 sits in the middle at neutral.
.
Our egg whites in question is sitting around pH 8 to 10 (Actually, more precisely speaking, fresh egg is pH 8, & older egg is at pH 10 as the acidity escapes from the pores of the egg shell during storage). Meaning, it is slightly on the alkaline side of the scale.
.
Lemon juice & vinegar is very acidic. They sit on a pH 2. Cream of tartar is at pH 4. Each number on the scale is 10 times more either way each time, so you can just imagine how super acidic these are.
.
In terms of whipping egg whites for baking, the protein strands (as explained in Step 1) react better when it is near pH 4 to 6. From this you can understand that when you add lemon juice/ vinegar/ cream of tartar,  you are readjusting the pH so that your egg proteins have a better chance. Note of warning though – too much added will have an inhibiting effect on foaming.
.
When I bake, I personally don’t bother with lemon juice/ vinegar/ cream of tartar. I like preciseness, so when a recipe calls for a ‘pinch’, it is too vague for me. But, if you are to use any of these ingredients, I would suggest that cream of tartar is probably the best option of the lot, as it is the least acidic at pH 4.
.
Note C:
Should sugar be added in the middle or the side of the bowl?
Quite some years ago, I came across somebody’s food blog, boasting about how adding from the side of the bowl was her idea, & how the method caught on. “…as dumping sugar in the centre would deflate the foamy whites.” Firstly I should point out, that that is wrong. Please pour in the sugar in a slow steady stream in the centre. If whipped correctly at each stage, the weight of a bit of sugar will not deflate any foam. The major problem when adding from the side of bowl is, it is a lot more difficult to get your whisk to, & because of that, you might have granular bits that hasn’t been incorporated sitting on the side, which would make your whites syrupy.
.
x . . x . . x . . x . . x . . x . . x . . x . . x . . x . . x . . x . . x . . x . . x
.
Lastly, my personal take:
.
Here is what I believe makes a baker create the best foam. And that is… ‘Imagination’. ‘Observation’. ‘Taking pleasure’. ‘Repetition’. 
.
In this particular case with whipping the finest foam, imagine how the actual air can be best incorporated.
.
For example:
After reading my guide above, you now know that sugar makes the foam stable, but at the same time, if too much too soon, it inhibits it, right? So observe the foam you’re whipping, & imagine the bubbles forming. Do you think your protein network is tangling well? Imagine the new air bubbles created – popPOPpop! Oh you need more sugar? OKAY! Let’s pour more sugar in! Let’s trap the next batch of air!
.
When the whisking is done, feel the pleasure in how the bowl has gotten heavy with so much air inside. You’d be really amazed with the difference in weight. Take pleasure in the confirming moment that ‘air’ is actually ‘heavy’. Smile at how well you’ve managed this task!
.
Every week, I whisk about 25 egg whites in one go for the 6 flourless chocolate cakes for my cake stall. I make this in a huge huge bowl. When I succeed with whisking the best foam, I notice that my cakes are taller, & it looks good. I also get a bigger yield from it which could mean a sale or no sale for me! ^^
.
Ofcourse, like anybody, my skills were not good in the beginning, but over the years, I’ve gotten better. Good enough to now be able to write this ‘how to’ article. With baking, practising, practising, practising is the only way to success. Like learning a piano perhaps or riding a bike, you’ve got to practise it repetitively to get better. You can’t expect it to be amazingly perfect the first time round. No one is a superman or a superwoman!
.
x . . x . . x . . x . . x . . x . . x . . x . . x . . x . . x . . x . . x . . x . . x

January 21st, 2014

Crepes dentelles (aka gavottes & paillets feuilletines)

www.cocoandme.com - Coco&Me - Coco And Me - Crepes Dentelles/ Gavottes/ Paillets Feuilletines recipe - with step by step pictures - Broadway Market E8 - Tamami - Cake Stall - London

.

Recently I needed some ‘paillets feuilletines’ for the French dessert I was making. I don’t know about where you live, but here in London, it is not easy to get them off-the-shelf. It is definately not mainstream, & instead it is a specialist baking ingredient. Ofcourse, I could get them online, but they sell them in large packs (all I needed was a tiny amount to cover the side of a cake as decoration), & besides, you’ve got to wait several days to get it delivered! Let alone forking out the shipping fee! (I’m a stingy kind of a gal.)

.

Upon research, I realized that crushing up ‘crepes dentelles’ (another name for these is the brand-name called ‘Gavottes’) is a great substitute, or if not the same as the ‘paillets feuilletine’ itself. You won’t believe how happy this realization made me! Because it means that I could make them at home whenever needed, moreover, it’ll be fresher & crunchier! (And quite probably superior than store-bought because it won’t have any substances you won’t normally include in a home-baking situation).

.

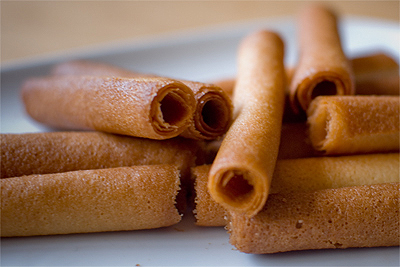
  • Def: Crepes dentelle is a wonderfully delicate & flaky cookie that is often folded in to a cigar shape. Buttery in flavour, it is made from thin crispy crêpe that is rolled as soon as it is out of the oven. It originates from Quimper, a charming little town with an almost village-like atmosphere, in the cultural heart of Brittany, France. Crepes dentelles are a delight to eat on it’s own or pairing it with cream-based desserts.
  • Def: Paillets Feuilletine is a baking ingredient that is often used as a component in French desserts for it’s crunchy texture. It is used for Praline Feuillete for example, where feuilletines are stirred in to chocolate & praline paste (… think posh version of ‘chocolate cornflake cake’). Pâtissiers will then spread this thinly in a layered cake to add crunch to a moussey cake. Chocolatiers might enrobe feuilletines mixed ganache to make crunchy bonbons.

.

So here below is my own recipe for Crepes Dentelles slash home-made Paillets Feuilletines. As with all my recipes, I have left no stone unturned & has lots of notes alongside. It uses basic ingredients, but has a fair amount of variables to consider. And if you are making the cigar shape, you’re most definitely throwing in some burnt fingers in to the bargain too. Discouraging? Sorry, but yeah, I thought it wise to warn you prior…

.

x – x – x – x – x – x – x – x – x – x – x – x – x – x – x – x – x – x

.

Crepes Dentelles/ Paillets Feuilletines Recipe:

(Yields 18 Crepes Dentelles using a 9cm x 16cm template)

.

Ingredients:

  • 60g melted butter
  • 110g sugar
  • 1 egg white
  • 60g flour
  • about 35 to 40ml of water

.

Equipments you’ll need:

  • A stencil template (please read below the method for how to make)
  • Metal spatula
  • Two or more sheets of Silpat

.

Method:

  1. 1. Preheat the oven to 210 degrees.
  2. 2. Melt 60g of butter completely in a mixing bowl.
  3. 3. Put 110g of sugar in the hot melted butter. Stir until the sugar has dissolved & is not grainy.
  4. 4. Whisk in 1 egg white.
  5. 5. Sift in 60g of flour.
  6. 6. Use a whisk to mix in to paste.
  7. 7. Pour in half of the water & mix well. Then pour in the rest gradually to the correct consistency.
  • (Note that here, the final consistency of the batter is very thin & runny like single cream. – This consistency is THE KEY to how smooth your Crepes Dentelles’ surfaces will turn out to be. If too thick, the surface will be rough with air bubbles. If too thin & runny, you will be having trouble containing it within the stenciled shape. I have given you the rough indication of 35 to 40ml of water, but the correct consistency for your batter has to be gaged by your senses, as it is variable.)
  1. 8. Spatula all of the batter in to a piping bag.
  • (It makes the following work much more methodical & a lot less messier.)
  1. 9. Lay the stencil template on the silpat. Hold down to keep it flat & in place. Spread on the batter evenly with the spatula.
  • (There are three things to consider here:
    A: Domestic ovens tends to brown goods unevenly. For example, my oven browns faster from the edges, which makes it difficult to evenly brown my sheet of Crepes Dentelles. So, for ‘even’ browning, the placements of the batter on the silpat has to be considered. The middle of the tray (away from the edges) is best.
    B: Also, please resist the urge to spread too many shapes on one tray. When the time comes to rolling them in to Crepes Dentelle shapes, there is only about 15 seconds to do so before it’s too rigid. About two spreads per tray would be ideal I think.
    C: Spread thin. Please read about this in the notes below under the title ‘Stencil’.)
  • (Please use the stencil even if you are making Paillets Feuilletine, as it’s easier to spread batter thinly & evenly.)
  1. 10. Place the silpat on the baking tray.
  2. 11. Insert this in to the middle-shelf of the pre-heated oven & bake.
  3. 12. In the meantime, while you wait for it to be baked, spread the next batch on another silpat. You can pop it in when the first comes out.
  4. 13. The baking could take anything between 2 to 4 minutes. Best to check wether it is done from 2 minutes onwards. You might also want to turn your baking tray around to brown it evenly.
  • (It is done when there are no white areas. But be careful not to over-bake – it could be that extra 10 seconds more that makes your Crepes Dentelles/ Paillets Feuilletines taste burnt. Use your first batch as an indicator to get familiar with the correct shade of brown.)
  1. 14. If making Paillets Feuilletine, take the baked sheets off the silpat to cool, then crush with your fingers. If making Crepes Dentelles, immediate start rolling it in to shape. – To roll in to round cigar spirals, use a straw or any thin cylindrical rod.
  • (The crepe is only pliable for the window of 15 to 25 seconds.)
  • (I prefer to turn the sheet back to front, & roll the surface that was facing the silpat on the inside. This is because the silpat side is glossy from being baked on the glass-fiber within the silpat. Furthermore, detaching the sheet off the silpat first makes the rolling process easier.)
  1. 15. Continue baking by swapping turns between the two silpats. Just remember to clean off any excess bits on the silpat by wiping with kitchen paper or by scraping with a different spatula.

.

www.cocoandme.com - Coco&Me - Coco And Me - Crepes Dentelles/ Gavottes/ Paillets Feuilletines recipe - with step by step pictures - Broadway Market E8 - Tamami - Cake Stall - London

.

x – x – x – x – x – x – x – x – x – x – x – x – x – x – x – x – x – x

.

www.cocoandme.com - Coco&Me - Coco And Me - Crepes Dentelles/ Gavottes/ Paillets Feuilletines recipe - with step by step pictures - Broadway Market E8 - Tamami - Cake Stall - London

(From second batch onwards, remember to clean off any bits on the silpat by wiping with kitchen paper or by scraping with a different spatula.)

.

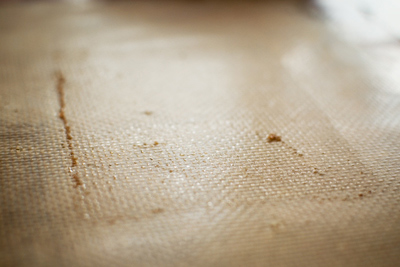
www.cocoandme.com - Coco&Me - Coco And Me - Crepes Dentelles/ Gavottes/ Paillets Feuilletines recipe - with step by step pictures - Broadway Market E8 - Tamami - Cake Stall - London

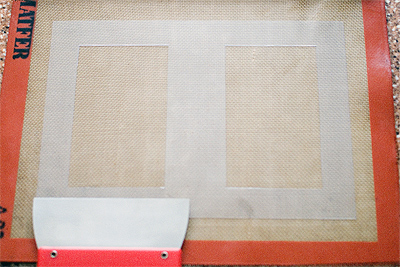
(Spread the batter thin. You can almost see through to the mesh of the silpat!)

.

Stencil:

  • Finding the material: To make the stencil template, first find a plastic sheet that has the desired thickness. The thickness, or should I say ‘thinness’ is vital to get right. If your crepes are too thick, it’ll be chewy. But if it is too thin, it will be too fragile & break apart as you roll. For my crepes, I used a 240 micron (2.4mm) acetate sheet that I purchased from CassArts. Sometimes, there might be something similar around the house that could turn in to a good stencil. The stiff plastic folder sleeves for filing could be a contender. Or maybe you have a see-through plastic gift box that is stiff enough? If push comes to shove, perhaps you can even cut out the side of your cereal box…
  • Cutting to size: I like to cut mine with lots of ample frame all around so that the batter does not land on the silpat. It keeps the silpat clean & crumb-free for the next batch. The measurement of the rectangle is up to you. FYI, mine is 9cm x 16cm.

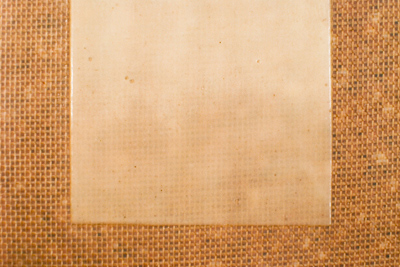
.

www.cocoandme.com - Coco&Me - Coco And Me - Crepes Dentelles/ Gavottes/ Paillets Feuilletines recipe - with step by step pictures - Broadway Market E8 - Tamami - Cake Stall - London

(My spatula is wider than the cutout area.)

.

May 9th, 2013

Bite-size french toast using everyday pre-sliced bread

NB: Please note, this recipe is especially created for when using everyday pre-sliced bread from the supermarket that is not stale.
.
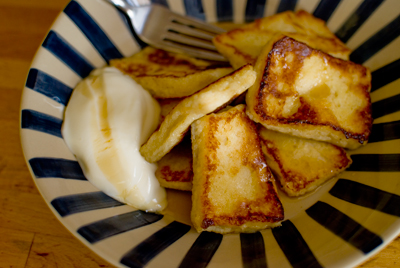
Coco&Me - www.cocoandme.com - Coco and Me - Quick french toast recipe with process pictures
(Bite-size French Toast! No need to fuss with knife! ^^)
.
Desperately seeking ‘something’
Picture this – bang in the middle of the night, you’re working on the computer. Then the train of concentration loses its steam & thoughts of snacking invade the mind. You ponder what goodies you might’ve lurked in the kitchen cabinets, but a pang of desperation throbs you when the realization of anything everything sweet is missing from your life. Cue the stomach & its whining growl…  
.
… This French Toast recipe actually came about at such moment. I desperately wanted a sweet ‘something’ to snack on in the middle of the night. But it needed to be:
  • very quick & simple to make (will not want to wait for my sweet fix)
  • easily can make for just for one person (it’s just me)
  • use ingredients that’s always at hand at home (it needs to be a reliable recipe to fall back on every time)
  • no need to fire up the oven (too fussy)
  • does not use the hand mixer (too noisy at night)
.
Hmmm, French Toast! As a mid-night feast! Ah…, yes-yes, ofcourse it’s normally consumed for breakfast or brunch, I know that, but it’s ingredients – eggs, sugar, milk, bread & butter, I always have at home & who cares about formalities when no one is watching in this nocturnal hour? It should be simple enough to put together – just dip the bread in eggy milk then pan-fry it with butter, & hey voila!
.
And so my quest starts.
But…, hang on, the first time I made it, it didn’t taste great. The result was unforgivingly too soggy in the middle. Why? Then I analyzed this:
= I’m using cheap thinly-sliced bread from the supermarket & the bread is not stale like it ought to be. 
.
Stale? Yes,typically you’re supposed to use stale bread that’s gone a bit tough & lost a bit of moisture. I guess it must be a universal rule for it. I mean, it’s even called ‘pain perdu’ in French, which means “lost bread”, suggesting that the bread in question is of a wasted, or forgotten one.
.
But realistically, how often do you have a perfectly stale bread at hand when you need it? I certainly don’t. Besides, the supermarket bread rather goes mouldy than stale when old. And so my solution to this was to… lightly toast the fresh bread (then cooling it) before dipping in the eggy mixture. That should mimic stale bread by taking some of the moisture away!
.
To remedy the sogginess, I propose five solutions:
  • Put less milk in.  
  • Cut the bread in to smaller pieces so that it soaks the mixture quicker, & cooks to the core quicker. Smaller is also easier to flip over in the pan without fuzzing the shapes.
  • Fry the bread at very low heat to cook through to the core.
  • Use the lid as you fry so that it steam-cooks the bread. It’ll get fluffier & bouncier.
  • Warm the milk in the microwave prior to combining with egg mixture (I got this idea from the way creme patisserie is made). This in effect will make it quicker to cook as it is already warm when it hits the pan.
.
Crust or no crust
When I was a child I used to just tear out & eat just the innards of the bread, which totally annoyed my mother. – Even now at age 37, I secretly still prefer to chop away the crust especially when making sandwiches, but my Mr.D ~ who is German & proper (Lol!) ~ would scorn, which totally makes me feel like a silly child again, so I daren’t do it nowadays. And now that we are supposed to set a good example in front of our children, I can never kiss goodbye to ‘le crust’.
.
BUT! French Toast is an exception. This is a sweet dessert! It’s an indulgence. Might as well have it the way we like it huh? :) Besides, jokes apart, I personally think that the egg-sogged crust lends a slight wet cardboard-y texture, & takes half the fun out of eating the main super soft part anyways!
.
Aesthetically pleasing French Toast shape? = 8:5 ratio
Upon cutting the bread, call me pedantic or just plain old silly, but I thought to myself: I wonder what the ‘most pleasing rectangle’ is?  
.
The answer I settled on was to cut it to the golden ratio, which the special number is approximately 1.618. Meaning, I will cut the length to 1.618 times of the width. Or to round it up simply, the ratio of length to the width will be 8:5. I’m sure the ancient Greeks would approve of this french toast shape! Lol!
.
NB: If you cut the toast in to 4, it’s pretty much 8:5 each, so no need to get the ruler out! 
.
(Please take this whole measuring thing with a pinch of salt though, it’s all a bit of a pa larva that I’m making here…! You can ofcourse cut it in any way you like!)
.
So how long should the bread soak in eggy milk?
Some say over-night, some say 3o seconds & hey pronto. I’m more in the latter camp. I like the idea of this to be a quick dessert that can be made by whim ~ impromptu with things that can be found in your everyday kitchen. Besides, the pre-sliced white bread from the supermarket sucks the mixture up like a kitchen sponge in no time anyways!
.
Dressing up the French Toast
Please please try it with plain yogurt on the side. And a drizzle of maple syrup which won’t go amiss. And ah, perhaps even a sprinkle of cinnamon powder! The play between the cold yogurt & the hot french toast is so fine~♪, it’s so good~♫. The slight tang of the yogurt beautifully sets against the sweet toast too. 
.
x . . x . . x . . x . . x . . x . . x . . x . . x . . x . . x . . x . . x . . x . . x . . x . . x
. 
Coco&Me Quick French Toast Recipe
.
Ingredients:
  • 2 slices of white bread (preferably thick)
  • 1 egg
  • 15g sugar (vanilla sugar if you have it)
  • 60g milk (full fat if you have it) 
  • A knob of salted butter (for the frying pan)
  • Maple syrup (optional)
  • Plain yogurt (optional)
.
Method:
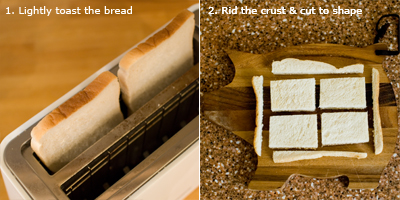
  • 1. Toast the bread lightly. (Here, don’t brown it, as you’d have the burn taste coming through the French Toast.)
  • 2. Cut the crust off the bread. Then cut to smaller size. (It’s easier to cut without squishing the ends if you cut the toast when it has cooled down.)
Coco&Me - www.cocoandme.com - Coco and Me - Quick french toast recipe with process pictures
.
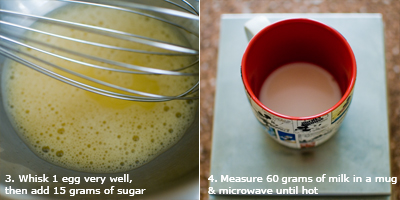
  • 3. In a bowl, whisk 1 egg until it loses its bounce, then add the 15 grams of sugar. Whisk until the sugar has completely dissolved.
  • 4. Measure 60 grams of milk in a mug & microwave until hot.  
Coco&Me - www.cocoandme.com - Coco and Me - Quick french toast recipe with process pictures
.
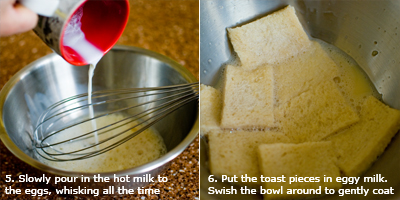
  • 5. Slowly pour in the hot milk to the eggs, whisking all the time. (The hot milk will not cook the eggs as the sugar will act as a barrier.)
  • 6. Put the toast pieces in the eggy milk. Swish the bowl around to gently coat the toast on both sides. (Don’t handle by hand as the toast is very fragile when soggy, it will lose shape or tear.)
Coco&Me - www.cocoandme.com - Coco and Me - Quick french toast recipe with process pictures
.
  • 7. Heat the frying pan with medium-low heat. Dissolve the knob of butter. Then align the soaked rectangular bread.  
  • 8. Pop the lid on & lower the heat to minimum.
Coco&Me - www.cocoandme.com - Coco and Me - Quick french toast recipe with process pictures
.
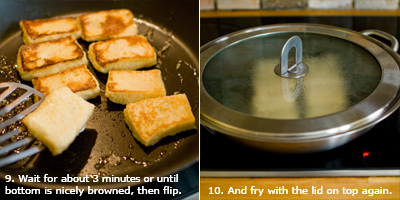
  • 9. Wait for about 3 minutes or until the bottom side is nicely browned, then flip to the other side.
  • 10. And fry with the lid on top again.  
Coco&Me - www.cocoandme.com - Coco and Me - Quick french toast recipe with process pictures
.
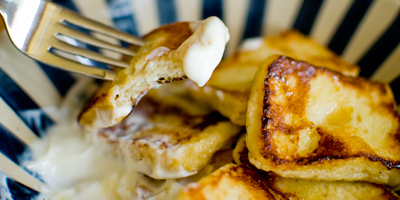
  • 11. When the bread is nicely browned, transfer to a plate & eat it straight away while it is hot! (preferably with a big dollop of plain yogurt & a generous drizzle of maple syrup!)
Coco&Me - www.cocoandme.com - Coco and Me - Quick french toast recipe with process pictures
Bon Appétit! T xx  
.
x . . x . . x . . x . . x . . x . . x . . x . . x . . x . . x . . x . . x . . x . . x . . x . . x

« Previous Entries