February 11th, 2007

The ‘About Me’ page

snow covered garden

(Thursday 8th of February – London woke up to a blanket of deep snow)

.

For this week’s blog entry, I’ve decided to spend the time writing ‘About Me’. It’s something I ought to have done right from the beginning of the blog-life & it’s been bugging me… If you like, please follow this link, or use the link from the lefthand column to read it. Thanks!
.

And remember dearest readers, next Wednesday is Valentine’s Day!! Remember to take this opportunity to treat the special people around you to thank them… Silent gratitude isn’t much use to anyone.
.

This Saturday’s trade:

As for me, Valentine’s Day is one of the most important events on the calendar as a Chocolatier (together with Easter & Christmas). I’ve been extra busy with making chocolate hearts, heart shaped tarts, & generally more truffles than usual. It was meant to be ‘My’ day. I looked forward to selling out quickly & with extra profit…
BUT, there were two factors working against me;

firstly, Valentine’s Day being another 5 days away, people were not buying my heart shaped tarts as gifts because it won’t last til then. As for the chocolate hearts (with assorted chocolate buttons inside), I did sell out on those, but it felt like it was a struggle too. I blame the second factor that worked against me for this; that there were heavy rain from the morning til 11ish which put people off coming to the outdoor market. – So I had a rather difficult time selling – in the end, I must have stayed on til after 5pm to sell…

February 4th, 2007

About Butter

Butter

.

So far in previous posts I have written facts & tips on how to use the essential baking ingredients: flour, eggs & sugar. This week is about Butter. Just like the others, knowing how best to work with butter is vital for successful happy baking!
.
What is butter?
Butter is essentially the concentrated fat of the milk with some water. It is made from milk, cream or both of these ingredients. Commercial butter may even be made from whey which is taken during the cheese making process. The colour of the butter varies from dark yellow to creamy white – this is due to what the animal’s are fed on, or is sometimes manipulated with food colourings. The basics of butter making is simple – they produce it by churning the milk/ cream until the fats separate from the liquid (buttermilk).
.
What is the best way to store butter?

  • Storage of unsalted butter: up to 2 weeks refrigerated & up to 5 months frozen from day of purchase.
  • Storage of salted butter: Salt gives better shelf life; up to 2 months refrigerated & up to 6-9 months frozen from day of purchase.

Make sure it is properly sealed in its foil packaging to avoid it turning rancid from exposure to air, & away from smelly foods as it readily picks up odour. The best way to defrost is to place the required amount in the fridge for 6 hours – never leave it in room temperature as it’ll end up with water droplets sweating out of it.
.
How soft is room temperature butter? How do I achieve it?
You can tell wether you’ve achieved ‘Room temperature butter’ when the softness allows you to ‘easily’ depress the surface with your finger, at the same time not melting.
To obtain it, all you have to do is to leave the quantity of butter your recipe requires (still in its packaging) out in the room for 30 minutes. – I never have the time nor patience to do that (or indeed remember to take it out in advance), so I just cube my block of butter straight from the fridge & zap it in the microwave at 10 second intervals at first & then careful 5 second gaps until the right consistency is reached. Easy peasy.
.
How do I cream butter? And Why?
To cream butter, first start off with cubed butter that has been softened to room temperature. Place in a deep mixing bowl (so that it doesn’t spit everywhere) & using the mixer, beat it till it is ‘creamy’, soft, smooth & light from incorporating the air. Use immediately.
Typically, many sponge recipes require you to whip the butter to a cream texture before you add the sugar. Once sugar is added to correctly creamed butter, it has incorporated the air in to it which would then cause a foaming action in sponge cakes. (when the cake batter is in the oven, the incorporated air is like a bubble, trapped, & it eventually ‘sets’, leaving tiny holes in your soft sponge).
.
Why do baking recipes call for ”unsalted’ butter’?
Salted butter is tasty for spreading on your morning toast, & its shelf-life is a lot longer than unsalted. But for baking, the taste of salt gets in the way, & besides, salted butter browns faster. So even if a baking recipe such as madelaines, pies, and buttercakes call for salt, you’d use unsalted butter and then sprinkle in the salt separately to control its saltness.

.

How do I make home-made butter?
Please follow this link for an online recipe I found.

.

Health facts:
One tablespoon of butter (14 grams) contains 100 calories, of which 7 grams are saturated fat, and 30 milligrams of cholesterol. In other words, butter consists mostly of saturated fat and is a significant source of dietary cholesterol. For these reasons, butter has been generally considered to be a contributor to health problems, especially heart disease.

Also, people with milk allergy need to watch out.

.

Can I substitute butter with margarine?
In principle yes – they are both fats. But if you are doing it for health-conscious reasons, you’d have to be aware that there are loop-holes. Some margarine contain trans fats (the main dietary culprit in raising blood cholesterol) so please read the back carefully. The water content is slightly different between the two, & because of this, the careful balance of the recipe will be mucked about & the result will not be perfect. Also the melt point is different (butter melts at body temperature, while margarine melts at higher than 98.6 degrees) which can only get you further away from what the recipe had originally been planned to do.
I personally never will substitute my butter. Margarine lacks flavour & is greasy on the palate. Butter is a natural ingredient, & is in these baking recipes for a purpose, for such examples as giving a rich buttery flavour & to enhance the other ingredients.

.

x x x x x x x x x x x x x x x x x x x x x x
This week:

After last Saturday’s successful return to the market after my 1 month break, I’ve cranked up my energy & work-volume to Max & am buzier than ever with making n’ baking!

January 28th, 2007

Recipe photos

sample of how the recipe is described in thumbnail format

(This week, I have revisited my old post about the Tarte Tatin & photographed each process. Please click this text to have a look!)

.

I own many many cookbooks. English, French & Japanese. I have formulated a very strong idea of what a cookbook should be like. I know what works, what doesn’t.

.

One of the ‘major’ features that every cookbook should have is, that it HAS TO have a picture of the finished product with ‘every’ recipe. It is a total ‘must’. Otherwise how would the reader know how it is supposed to look like at the end, or even muster the will of making it in the first place?! I tell you, so many western cookbooks are stingy with photography. Soo dissapointing. There’s even books with black & white photographs – to save on the CMY of the CMYK. It makes the food look unappetizing. What’s the point? Or worst still, the relevant cake picture is not next to the recipe page! How unfunctional! For someone like me, who takes a cookbook to bed to read, & fantasize each recipe being cooked out (how sad am I), pictures must be there to do it to me (D calls it my ‘food-porno’).
.

Now, the Japanese cooking books – they are the gems (yes, I am biased). They’d always have the picture of the product by the recipe. It’s always a perfectly fuctional shot of the whole cake too – not arty-fartied-up with blurring & cropping in an odd way to make it look trendsy. Not only that, most Japanese cooking books have ‘the process’ pictures depicting each stage of the recipe. At a glance, you’d know what is involved. It truly is my best source of ‘food porno’…
.

I realized that I’d like to do such approach to my recipes in my blog too. So this week, I have revisited my old post about the Tarte Tatin & photographed each process. Have a look. I plan to revisit my other recipes in my blog & do ‘process-images’ for them too.
.

This week:

My son is not adapting to the new arrangement of going to nursery very well – hates it infact, and gives a right old tantrum when we try to leave the house for it. I have been at the nursery with him everyday, waiting in the parent-room, & then get pulled in to the classroom when my son is distressed. – It’s tough for the kiddo y’know – he’s always been looked after by me, or if I’m working, by his grandparents – he’s maybe been looked after once or twice by his best friend’s mummy, that’s all, which is different because he knows her & has his best friend to play with. – I mean, I’d find it super-stressful if I was unknowingly thrown in to the nursery with 50 new faces! Go go my little kiddo! I know he’d shine there once he settles in…, just takes time that’s all…

January 22nd, 2007

About sugar (with vanilla sugar recipe)

Home made vanilla sugar with vanilla pod

(Home made vanilla sugar)

.
Sugar is a staple in everyones kitchen, & is used extensively in confectionery. Obviously it is sweet, but it’s more than that – it provides moisture, tenderness, enhances other flavours, provides stability in meringues, can caramelize, can even be bitter & increases shelf-life (A good example is jam. High percentage of sugar prolongs shelf life as it inhibits the bacteria to grow). But did you know that there are dozens of varieties of it available? It’s a minefield. It can be mystifyingly confusing… Before my obsession with baking I don’t think I ever used anything other than white refined granulated sugar!
.

So here is a list of some of the sugars. I think it’ll help understand why your recipe is calling for a particular type, & have confidence in switching it when you want to have a more caramelly flavour for example:

  • Granulated ::::: Very versatile, all-purpose sugar but one-dimensional in flavour. No aroma, so it’s great when you just want to have the ‘sweetness’ & pronounce the flavour of the other ingredients such as chocolate in a chocolate cake. – If a recipe doesn’t specify which sugar type to use, it’ll be safe to use granulated.
  • Castor ::::: Selectively sieved from the granulated sugar. It’s known as caster sugar because it is suitable for placing in a ‘caster’, a perforated jar or a bottle, similar to a flour dredger.
  • Icing ::::: It rapidly dissolves even in cold water. A must when you make meringue for macaron. Also great for dusting it on top of your finished product. It is made by grinding sugar to a very fine powder. A small amount of anti-caking agent (for example 3% cornstarch) is often already added to it to prevent clumping.
  • Preserving sugar ::::: Often used for jam making, it has the largest crystals that dissolves slowly which makes it less likely to burn the sugar as it does not settle in the bottom of the pan. It also reduces the need for stirring. Less froth is also produced resulting in a clearer preserve.
  • ‘Golden’ caster or granulated sugars ::::: Molasses is ‘painted’ to the white sugars to add the light golden colour & aroma. Slightly more flavourful than the white.
  • Demerara::::: Free-flowing crunchy crystals. Also good for sweetening beverages such as coffee.
  • Light/ Dark Brown ::::: Based on caster sugar. The molasses is ‘painted’ to give it colour & give depthy, fudgy flavour. (In some cases ‘food colour’ is painted on instead of molasses, to recreate the delicious brown look.) It’s moist, & it gives extra tenderness to the cake. Make sure to not let it dry out & it’ll be hard like a rock.

All of the above can be substituted with each other in principal. They come from the same stage of sugar process, & some are just that they are various crystal sizes depending on what you’d like to use it for.

The confusing part is… some of these can come as refined (bleached, refined white sugar which is pure sucrose/ carbohydrate), partly refined, or unrefined (typically 50% less processed than refined. It retains some of the natural properties, making it wholesome & healthy). It could be under naming such as ‘natural’ or some brands call theirs differently. You really have to study the package before purchase.

  • Light/ dark Muscovado::::: Unrefined natural sugar. Strong tasting natural molasses flavour. Brown & sticky. More unprocessed than Turbinado Sugar.
  • Turbinado::::: Unrefined. Similar in appearance to brown sugar with molasses flavour but paler & course granulation. Often used in tea. This sugar can’t always be substituted in recipes. Its moisture content varies considerably which can affect a recipe. You’d have to carefully adjust other ingredients such as the liquids.
  • Unrefined Soft Light/ Dark Brown::::: Distinctive caramel taste. Light & dark soft brown sugars can be replaced with one another only in small quantities. If you do, the cake will not turn out like you wanted it to, because the flavour & moistness is different between the two.
  • Molasses ::::: Dark syrup extracted during sugar manufacturing. Only a little is needed as it is very concentrated. Not as sweet as sugar. Replace no more than half the sugar called for in a recipe with molasses.

The following are the natural sweeteners:

  • Honey ::::: Distinctive flavour that varies depending on which flower nector the bees have been gathering. Generally, honey can be used in place of granulated sugar, it’ll make the cakes moist & dense. But watch out, it is 25 – 50% sweeter than sugar & tend to brown faster. So experiment with using less of it, it is said that you should use the amount of honey that is equivalent to ½ the amount of specified sugar, reduce liquid ingredients by ½, & reduce the oven temperature by 25 ¼ F.
  • Maple syrup ::::: Could be made from the maple tree sap, or artificially made with maple flavouring. Look for the word ‘pure’ when choosing. It has fewer calories & higher concentration of minerals than honey. Keep refrigerated and consume within 6 to 8 months.

And then for sweetening the chocolate ganache:

  • Invert sugar & Glucose Syrup ::::: It is highly effective in preventing crystallization, & so makes the mixture smoother with better viscosity. It is not as distinctively sweet or flavourful like the other sugars which is great when you rather want to pronouce the flavour of the chocolate itself. But inverted sugar is almost impossible to get if you are a home-user (it only comes in big multi-kilogram tubs) so try honey as a substitute.
  • Trimoline ::::: It is produced from beets. It emulsifies the fat, & prevents recystallization of sugars. It smoothes the texture & increases shelf life by retaining moisture. It has a sweetening power of 128%.

.

History:
Sweet tasting liquid from the Sugar cane (a tropical grass) was first discovered on the islands of the Pacific Ocean some 20,00 years ago (!) but the process of making sugar by evaporating its juice developed in India around 500 BC. It is from then on that the technology for sugar production slowly spread around the world, although for many hundreds of years, sugar was a highly prized and expensive ‘spice’ that was used only in the homes of nobility and royalty, just like the history of chocolate.
.
I recently came across the most insightful historic literature of how sugar was refined & then manufactured into loaf sugar back in 1876 London (loaf sugar was refined white sugar moulded into cone-shaped loaves – which then got cut up either by the retailer or at home using a cleaver & then pounded to powder). I love the way it’s written. Its not just an account of what it was like, but more like a good novel. It describes one of the workers as a creature with chest all grizzly-haired, calls it the ‘Sugar Ogre’ in waiting for juvenile delinquents. – It’s a bit long, but persist. I found that it was worth reading.
.
x x x x x x x x x x x x x x x x x x x x x x x x x x x
.

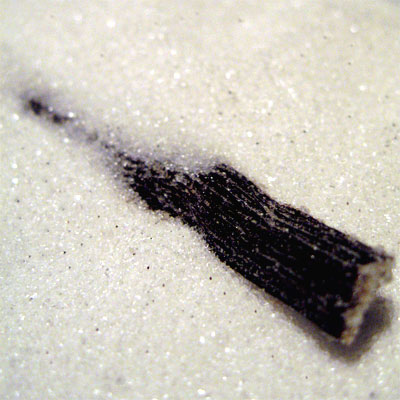
Home-made Vanilla Sugar Recipe:
Vanilla sugar is simply castor sugar with vanilla. There are no set rules of how to make it. If you want, you can change the ratio of sugar/ vanilla according to wether you’d like the aroma to be intense or subtle. And you can keep replenishing more sugar in to the same jar & the pod would sufficiently flavour the sugar.

.
Ingredients:
200g Granulated or castor sugar (any amount is okay – it just lessens or increases the aroma of vanilla, thats all)
1 x Fresh or used vanilla pod (There are two ways to go about it. To use pod skin & seeds, or just pod skin after you’ve used the seeds for other baking requirements)
Container with tightly fitting lid (I find it is pretty when white sugar has dark specks of pure vanilla seeds, so I recommend a clear glass jar!)

.
1. Chop the vanilla pod – for example, in half. If you’re using fresh pods, de-seed & then chop.
2. Place both sugar & vanilla pod (& seeds) in the jar & mix well, distributing the vanilla beans in the sugar.
3. Tightly seal with lid & store in a cool place. The sugar would be gorgeously scented in 1 to 2 weeks. It will keep indefinately without refrigeration.

.
Uses:
Use the vanilla sugar in baked goods & desserts that calls for both sugar & vanilla. Or sprinkle over home-made sponge cakes, biscuits, fresh fruit, custards, crème brûlée, crumbles, favourite breakfast cereal, hot coffee, milkshakes, yoghurt, buttered toast etc.

.
x x x x x x x x x x x x x x x x x x x x x x x x x x x
.
This week:
I have been busy in the evenings making Chocolate Valentines Hearts for the oh-so-busy Valentine season that’s creeping it’s way.
And my son has started nursery on Wednesday! A milestone. A bit of a tear jerker. It’s 1pm til 3.30pm, Monday to Friday. You’d think that it’ll give me more me-time, but it takes me 30 minutes to walk there, so by the time I walk him & go back home, it’ll only give me 1½ hours at home before I go & pick him up…!

January 13th, 2007

First Test Bake of the Wedding Cake (not mine!)

weddingcake_test1.jpg

.

This year I will be making a 3 tiered wedding cake. No no, it’s not for me, it’s for my market stall friend Sue’s daughter. The wedding is in May, so it is plenty of time ahead, but being of a slightly panicky character, I’ve been thinking about it rather a lot – I just had to get the test bake done to rest my mind by knowing what is involved. A wedding cake must be Perfect with a capital P, no slip ups allowed, & certainly not a sorry ‘leaning tower of Pisa’.

.

The design came about after intensively conversing with the client. The brief from the onset was to create a chocolate wedding cake. Chocolate, totally my forte! Additional specs were for it to be simple, no fancy decoration, & to fit on top of a 12 inch cake stand they wish to use. Oh, & it has to travel to Wales!

.

The result was this. A chocolate pound cake with raspberry & dark ganache layers, covered with white chocolate glacage. There are white couverture chocolate rectangles stuck all around the side. The rectangular slats are super shiny as it is hand-tempered.

The advantage of doing slats is that the cake can be neatly cut in to equal pieces when plating out to the guests. Also, I can make these slats well in advance, which would take the pressure off a great deal. I’m going to supply extra slats as reserves, just incase some snap on journey to Wales – although I really think it’ll be okay because I will be making these slats rather thick.
.

Each tier will be supplied in seperate boxes, for safer transport. They will then have to stack it up on location themselves. Each tier will be balancing on the wooden plinths poked in to the cake (as in the picture above) which is very snugly secure.

.

I’m just so happy I did the test bake. So many lessons to be learnt came to light:

– Like how on conception, I was invisaging a ribbon around each tier to keep the slats bound together – but now I know that the glacage acts really well as a ‘glue’ to hold the slats in place & it’s pretty solid. I tried a ribbon around it, & it just took away the beautiful simplicity from it all.

– Another lesson was that it was difficult to cut it in to pieces because the slats were overlapping each other & I could not run the knife down unless I brake the slats in to pieces. So I must not overlap, which is a shame, I really like it as is. I’m afraid that if it were just jutting next to each other there will be inevitable & ugly gaps appearing. I need to work on a solution for that.
.

This week I’m in a right old moany mood.
I’ve been helping a family friend sell her stuff on ebay as she is moving house. Not fun at all, answering too many questions from the potential bidders & each time having to phone her n’ ask. And she keeps digging out more stuff for me to sell for her. My heart is not in it atall, & I can’t wait to start my stall so I have an excuse to get out of this…

.

On Tuesday night, we had to take our son to the hospital emergency room. He was breathing fast, sometimes tensing his body & even holding his breath for a few seconds. Soon the shivering started & his lips went blue which got us really worried. We hurried to the accident & emergency room, & while waiting to see the doctor, his temperature went shooting up high. The nurse gave him a paracetamol, which helped calm the temperature. We waited for almost 4 hours (which really gets me – there just aren’t enough doctors around!). During which I had to hear a man groaning in agony from behind the curtain because he can’t pee, & were stuck next to a chatty self-harming woman who has probably been there too many times. When we saw a doctor I was so thankful & appreciative, like I was seeing God. After examination, the doctor told us our son has tonsillitis. We were so relieved to know it was nothing serious… But they could not give us the prescription medicine because their pharmacy is shut over night. I mean, come on, what’s that all about hey? We want to give the medicine to our child there & then thanks…

« Previous Entries   Next Entries »