

About eggs
.
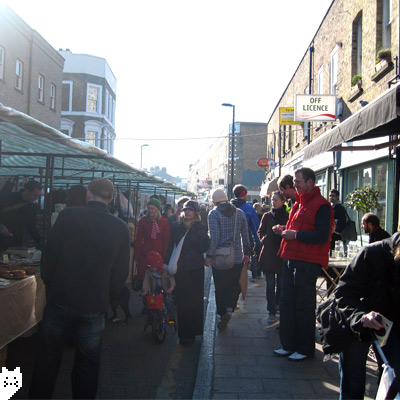
Last Saturday:
I have been slightly unwell all week & tired, so I made considerably less. No Tarte Tatins, Chocolate Tarts & no Gateaux Basques, & generally less quantities of everything. Actually I was thinking of not trading atall. But the customers would not trust me if I was unreliable. Next time they need a cake or some chocolates, they would not bother checking my stall out & buy elsewhere, right?
– Making less turned out to be a good decision anyway, as formidable amount of rain bucketed down until lunch time, & business was slow.
.
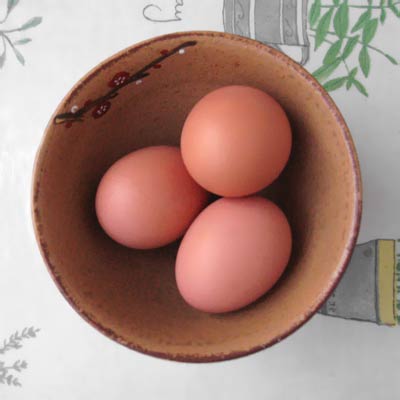
This week’s entry is about eggs.
Prior to any cake recipes added to this blog, I’d like to throw in my two cents’ worth on the subject of basic ingredients such as eggs, butter, flour & sugar. The reason being… Before attempts are made at baking, it’s best to have knowledge of the ingredients & know how to handle them to get a good result. There is nothing more irritating than ending up with a bad turn out & not knowing why it happened (or blame me for it!).
So lets start with the subject of ‘eggs’:
- BUY ‘free range eggs‘. It may command more than double the price of standard eggs, but the hens are bred on better diet & the egg has stronger shell, firmer & strong yellow yolk – much tastier & it is worth the extra cost. It is approx. 17 pence per egg… … … Or better still, buy ‘organic eggs’ approx. 24 pence per egg. (if you’re financially privilaged). Organic eggs are laid by healthy hens who have outdoor access. Their diet is organic – no pesticides, herbicides or fertilizers. Not fed any antibiotics, hormones or meat by-products (= parts of slaughtered animals, not including meat) to fatten them up or make them grow bigger… … … NEVER BUY ‘caged eggs’, ‘regular/ standard eggs’ approx. 7 pence per egg. These are ‘battery farmed’ chickens’, stuck in a small cage all day long, in artificially lit shed. Their diet contains antibiotics, hormones & other chemicals… … … If money is tight, buy ‘barn laid eggs’ approx. 13 pence per egg. Much more humane than ‘caged’, as they are in pens (although the hens are always kept indoors), & can be more ‘chicken-like’, spread their wings & socialize.
- Use Medium size eggs. Most cake recipes assume that an egg is approx. 50g (yolk 20g, whites 30g). using ‘large’ or ‘extra large’ would give you more whites than what the recipe calls for.
- Store eggs in a cool, dry place, ideally in the fridge.
- During baking, one of the basic and common cake procedure is to mix sugar in to the yolk. Here, always whisk in the sugar straight away. Never leave the sugar standing in the yolk. This is because the sugar (just like salt) would soak up the water from the yolk & you’d end up with solidified yellow bits.
- Some eggs can have salmonella, on the shell as well as inside the egg. Eggs must be handled carefully both when it is still in its shell & once it is cracked open. – Please remember to: Keep eggs away from other foods. Always wash your hands, equipments & work surfaces after handling eggs to avoid cross-contamination. Do not use dirty or damaged eggs. And keep in mind that thoroughly cooking eggs properly kills bacteria.
.
When I was new to all this baking, I had a hard time figuring out how best to beat the egg whites. I was full of questions such as ‘exactly at what timing do you incorporate the sugar?’. It’s plain obvious that correctly whipped egg whites are the core to any successful foam based cake. Getting it right is essential.
.
How to whip or beat egg whites:
1. Put aside the precisely measured sugar ready in another bowl.
2. Get a squeaky clean bowl & whisk. Any traces of grease would prevent the egg whites from foaming well. (Also, don’t use plastic bowls. They can harbour traces of grease. Instead use glass or stainless steel)
3. Crack the egg whites in to the bowl. Make sure there aren’t any trace of egg yolk. Yolk contains fat & it’ll prevent the egg whites from foaming well.
4. Start whisking the egg whites on medium speed.
5. Once the liquid has turned to foam (a cross between bubble-bath & a cappucino froth), pour 1/3 of your sugar from the side of the bowl. Turn the speed to High.
6. When the foam becomes finer, & you see fluffy peaks forming (like Summer clouds), add the second 1/3 of the sugar.
7. The last 1/3 should be incorporated when: the foam is shiny, you start to feel the resistence, & see defining peaks.
8. Just before you finish, rotate the whisk slowly around the bowl – this makes sure that all the foam is of equal size.
9. Fold in the foam to the cake batter straight away. It is deflating as we speak…
 –
– –
– –
– –
–
